Guide to better bird photography
Our guide to better bird photography will help you take better pictures of your feathered friends
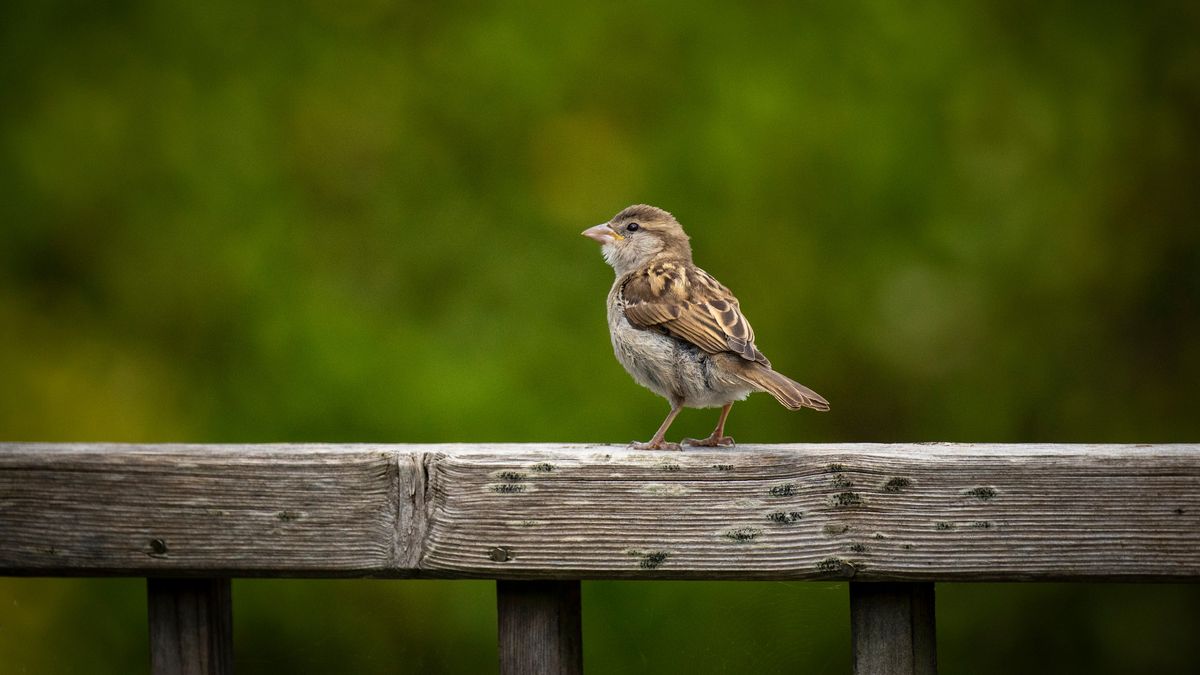
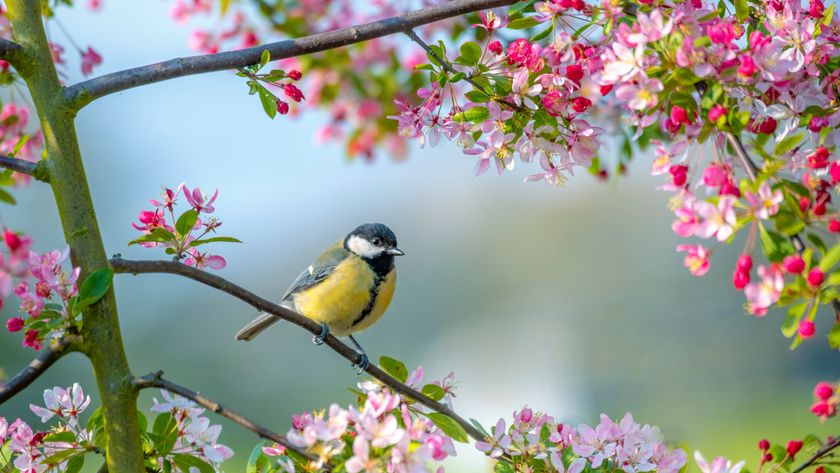
If you want to get great results from bird photography, then you’ve come to the right place. Birds, just like any animal, can be tricky to capture at their best, but by following just a few simple tricks and tips, you can instantly elevate your bird photography.
- Best bird feeder: Get birds of a feather flocking together in your garden
- Best squirrel proof bird feeders: How to stop furry pests stealing your birds' food
Most of the tips featured in this piece can be applied no matter what type of camera you’re using – even if that’s your mobile phone. If you’re a bit more enthusiastic about your pet photography, then there’s also some tips that will cater for you too.
Earn their trust and affection
Imagine being a small bird with somebody pointing a strange device in their face. Earn your bird’s trust by getting them used to your phone / camera, and rewarding them with their favourite treat as you’re using it around them.
Don’t stress too much about getting the perfect bird photo right from the off, as it will take time to get into the swing of things. It’s a good idea to switch off any noises or flashes/lights so as not to startle your bird if possible.
Think about lighting
The most flattering light for just about any subject – whether that’s birds or another type of animal – is natural light. If your bird is indoors, you can still utilize natural light by taking their portrait near a window.
If you want to shoot after dark – that’s fine – but just be aware of yellowish / orange colour casts appearing in your shots. Most modern devices cope well with artificial light, but it’s something to be aware of. If you are finding it to be problematic, you can compensate for this if you’re able to take manual control of your phone, or camera – use a Tungsten or Fluorescent White Balance setting.
Consider composition and angle
Probably the most important thing to consider with any photograph is the composition. That’s also true for bird photographs.
A good simple tip is to divide your frame into “thirds” – imagine three lines dividing the frame vertically, another three dividing it horizontally. Place your subject (aka your bird) at the point where the lines would cross for an eye-catching composition.
You should also think about which way your bird is looking. Leave space in the frame for the bird to look into for a more natural appearance.
Another thing that’s important to remember is getting on the same level as your bird. If you take a shot from above, you’ll overwhelm the bird and it won’t look natural. Similarly, if you take the photo from below, the bird will probably look unnaturally large. You could try both of these angles for a creative look once you’re confident / for a surreal effect, though.
What to do about the birdcage
If your bird is caged, then you might be wondering how this will impact your photography. The simple answer is to incorporate it into your compositions – use the cage itself as a literal frame for your bird for an interesting look.
You can also shoot through the cage bars, too, if you need to keep the cage closed. If you’re using a mobile phone, it might be relatively easy to place your phone lens up against the cage bars and not include them. If you’re using a larger camera, get close to the cage bars and use a wide aperture – it’ll throw the bars out of focus and it’ll appear as if they’re not there.
Select your focus point
As is the case with most animal portraits, the most dynamic photographs carefully select the focus point. For birds, focusing on the eye is generally a better idea than focusing elsewhere – such as the beak or the feathers. It will help bring out the character of your bird, too.
If you’re using a mobile phone, tap in the frame where the eye of your bird is to ensure that the focus point is in the correct place. If you’re using a standard camera, again, place the focus point over the eye before you take your shot.
Use the right focus type
If you have the option to select a type of focusing, then it can be a good idea to set continuous focusing (sometimes called AF-C). Birds can make sudden movements, and if you have continuous focusing set, then the camera should follow what they’re doing. Even better if you have a camera which has Animal Eye AF capability.
If you’re using a mobile phone, you might be able to set tracking focus if you have a professional or manual mode.
Best settings for bird photography
We’ve been through a few different tips for bird photography, but there are a few simple camera settings that you can use as a starting point to build on. Once you start getting the shots you want, it’s time to experiment with different settings and seeing what you can achieve.
When it comes to shutter speed, you’ll probably want to freeze the action of your bird, so it makes sense to use a fast shutter speed of 1/1000 sec or 1/2000 sec if possible. If you want to include a little motion blur for creative effect, try shooting at slower speeds such as 1/500 sec or 1/250 sec.
For aperture, the wider the better - which means lower “f numbers”, such as f/1.4 or f/2.8. If you are working with a phone, try using “Portrait” or “Aperture” mode - which most smartphones include - to recreate the effect of shooting with a wide aperture.
The ISO (sensitivity) you use will depend on the ambient lighting settings of where you are. That said, a mid-range setting of ISO 800 will allow you to shoot at a fast shutter speed, which is probably what you want for freezing action. If you’re in a very bright location, try using a lower ISO, or a higher ISO if the light is low.
Best bird photography lenses
If you’re pretty serious about photographing your pet bird, perhaps you’ve invested in a dedicated camera and are wondering what are the best lenses for bird photography.
A macro lens is a good idea for capturing fine detail, such as feathers. They also tend to be quite a good focal length (100mm being a classic option) to create enough distance between you and the bird to keep things comfortable.
You might also want to consider longer telephoto lenses if you have birds that are allowed to fly, since you’ll be able to capture them in flight.
If you’re just starting out, a 50mm f/1.8 lens can be a cost-effective way of creating pretty portraits with a blurred background.
Just keep trying!
The most important thing to remember is to just keep trying, have patience, and above all, have fun. Keep photographing your feathered friend and eventually, a style will come through. If you're interested in live-streaming your content. it's worth investing in a birdcam.
PetsRadar Newsletter
Get the best advice, tips and top tech for your beloved Pets
Amy Davies is a freelance writer and photographer with over 15 years experience. She has a degree in journalism from Cardiff University and has written about a huge variety of topics over the years. These days she mostly specialises in technology and pets, writing across a number of different titles including TechRadar, Stuff, Expert Reviews, T3, Digital Camera World, and of course PetsRadar. She lives in Cardiff with her dog, Lola, a rescue miniature dachshund.

